Dropshare – simple, robust file sharing
I recently discovered Dropshare while scrolling through the available apps on Setapp – which has come a long way since I canceled my subscription back in 2017. Setapp has allowed me to find and try out all sorts of niche apps I probably wouldn't have encountered otherwise. If you’re not interested in adding another subscription to your life though, Dropshare is available as a standalone purchase for $39.
Dropshare offers everything you'd expect from a comprehensive file and photo sharing app. It allows you to take screenshots, capture and annotate images, and record your screen. One feature that surpasses my current screenshot app, CleanShot X, is the built in support for “Import from iOS Device” option. This feature opens the camera on your iPhone, and when you take a picture, it sends it back to Dropshare for uploading – similar to the functionality added to Apple Notes a while back.

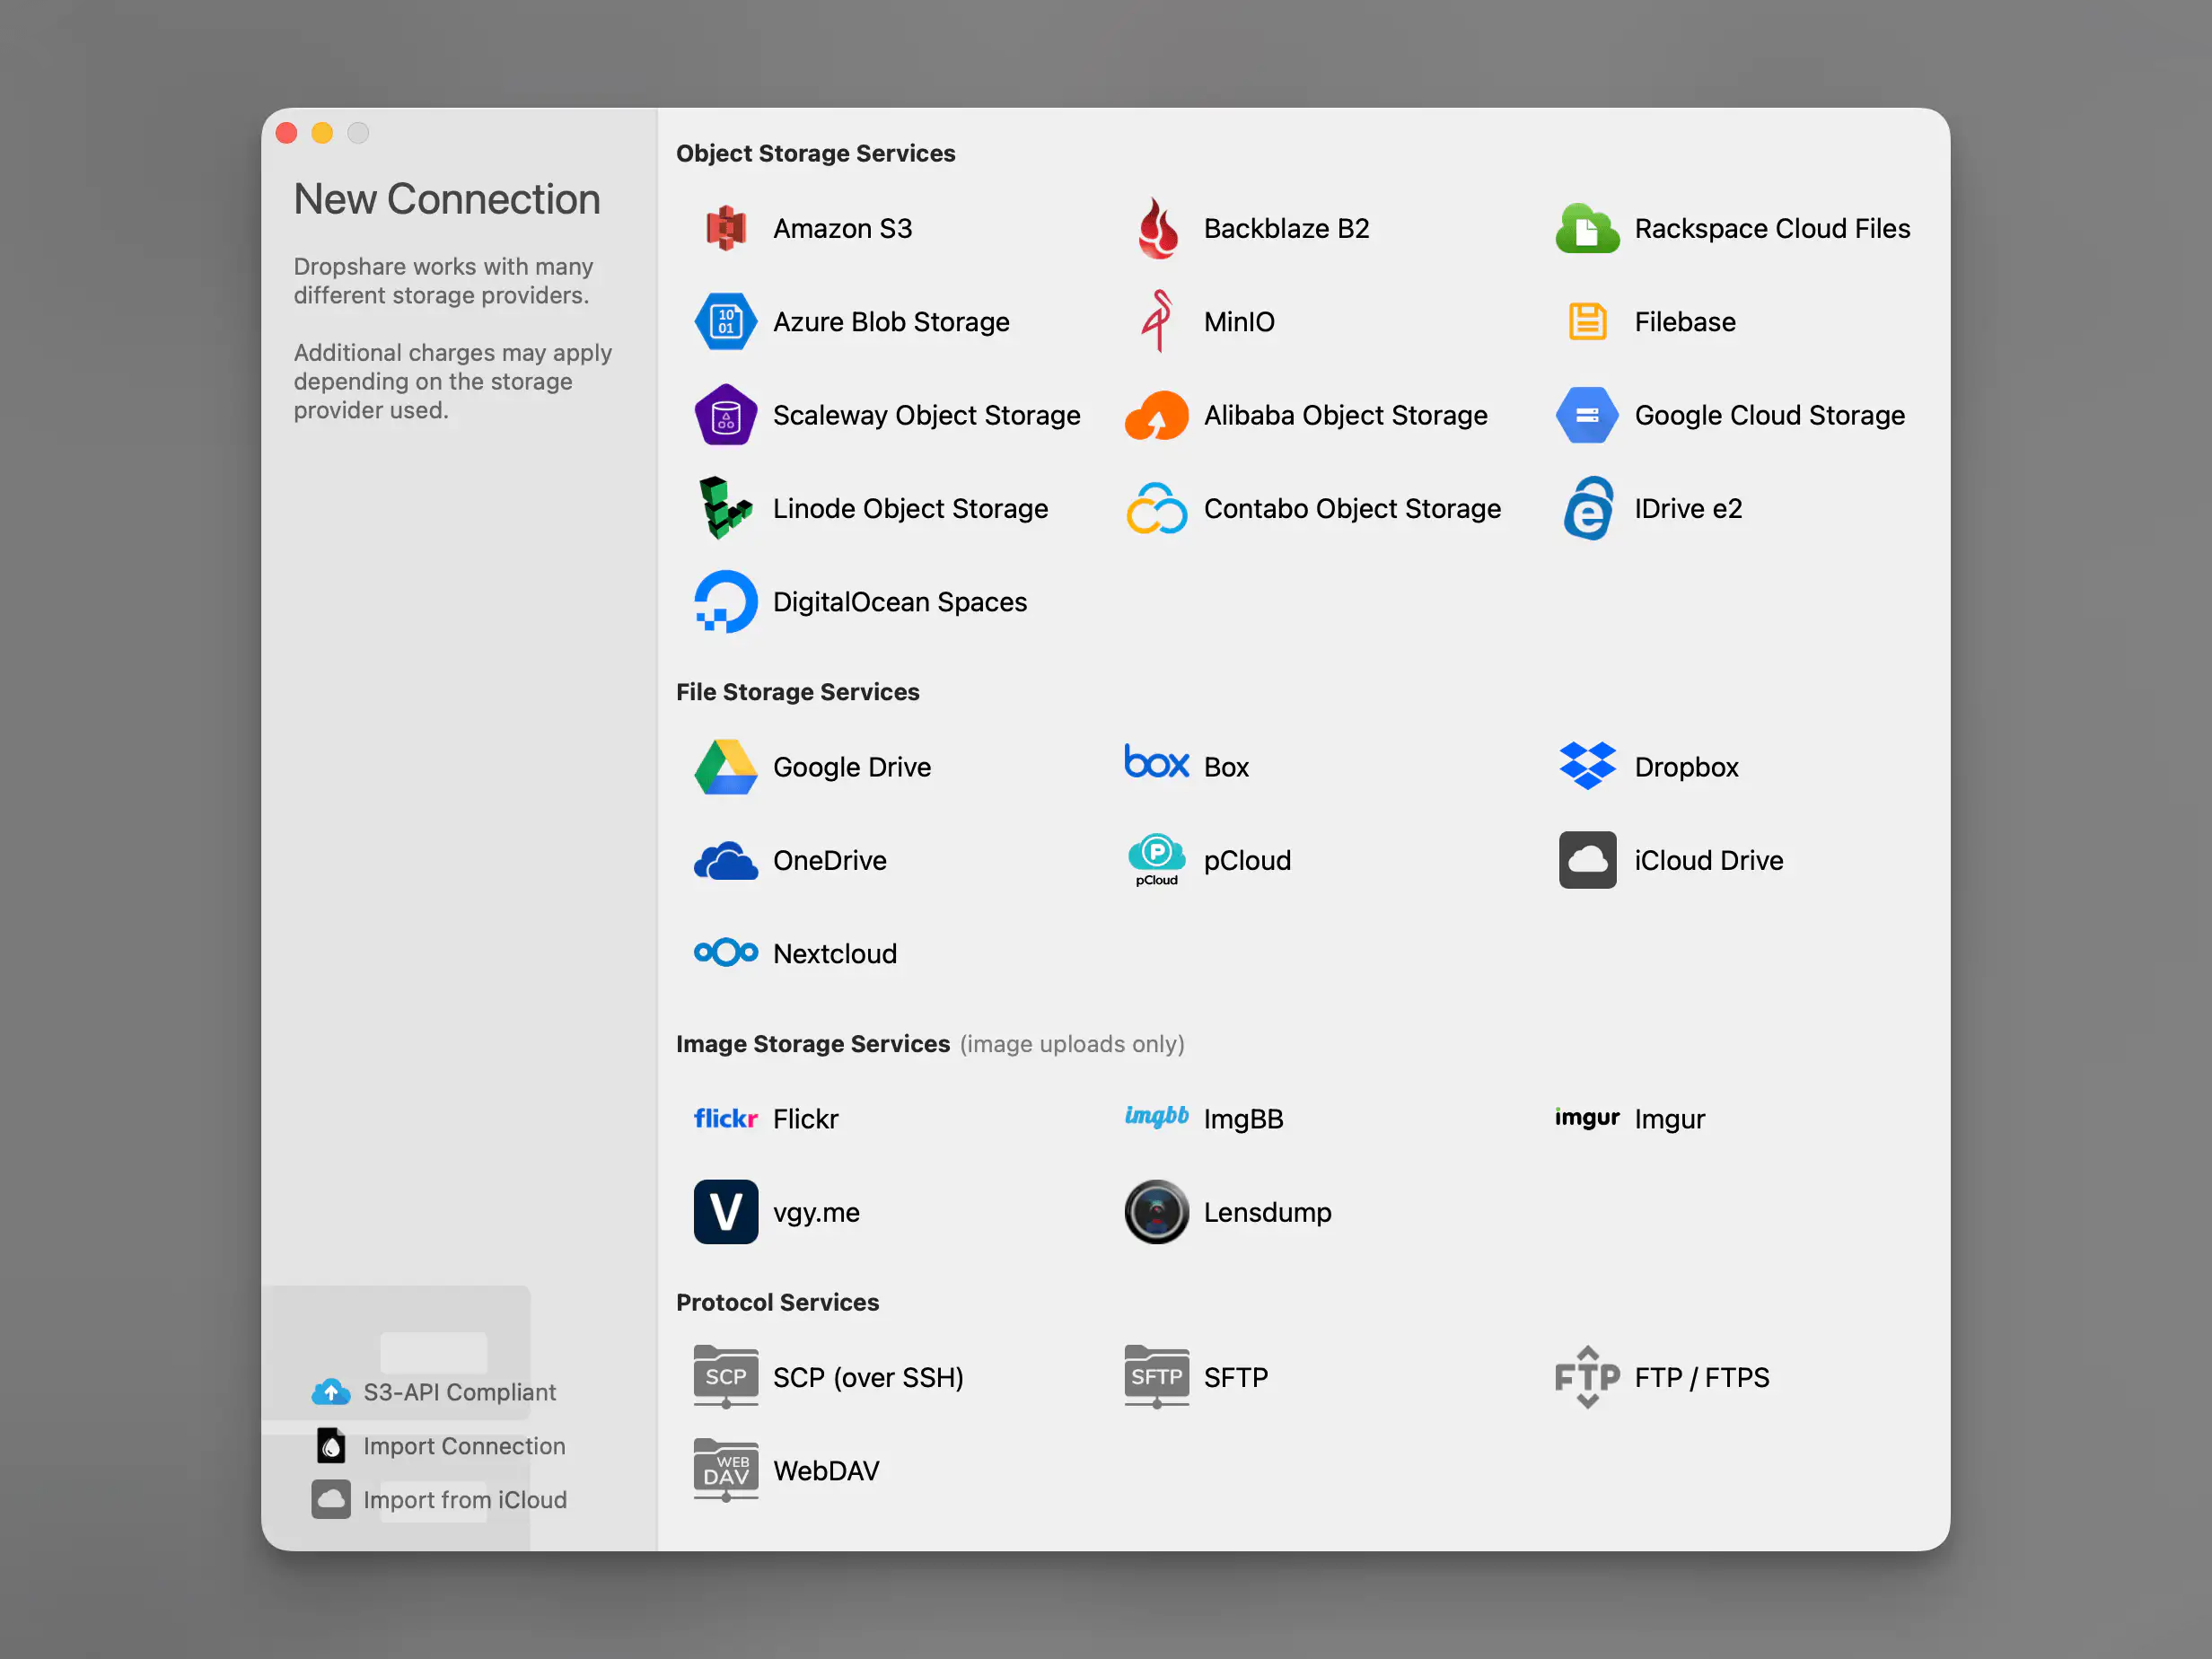
However, the best part of Dropshare is not its screenshot capabilities but its instant file sharing. It can connect to multiple object, file, and image storage services with an always-accessible drag-and-drop interface. A lightbulb went off in my head when I saw the SFTP option. My obsession with using my Bunny.net account – simply because I think CDNs are cool – led me to download the app and spend the next hour setting it up exactly how I wanted.
Setting up a connection with Dropshare is a breeze. You can get everything set up in a few minutes if you know how to navigate Bunny and your DNS settings.
Add a Storage Zone (with a Replication Zone for data integrity).
Add a Pull Zone and connect it to your Storage Zone.
Add a custom URL or subdomain to the Pull Zone (optional, but really cool).
Grab your FTP credentials from your Storage Zone.
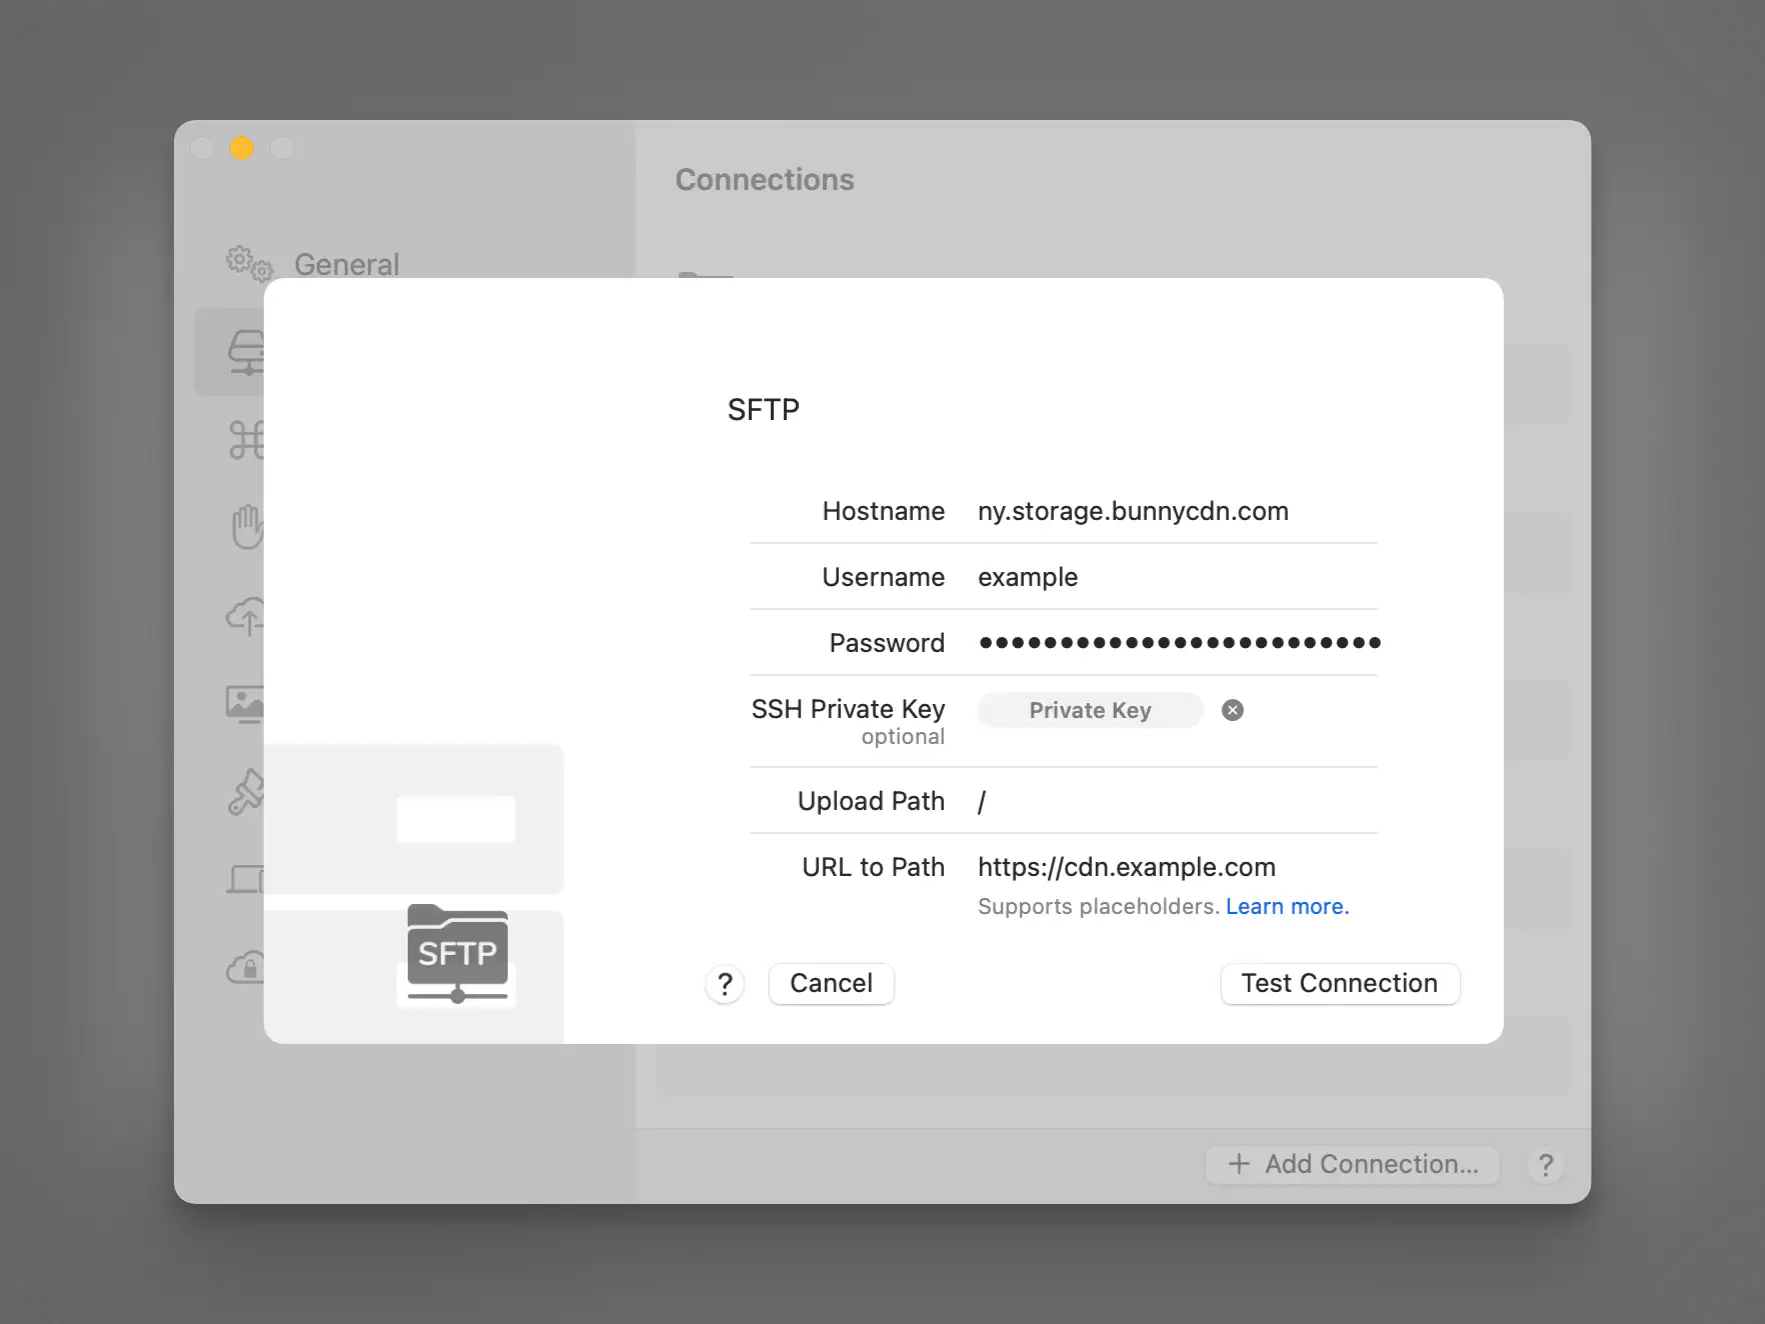
Input your FTP information into Dropshare’s SFTP Connection window.
Test the connection.
Once configured, you can immediately start uploading files to your Storage Zone, with the URLs being copied to your clipboard upon upload. Because Dropshare has an SFTP connection, it can delete files you uploaded directly from the interface. However, since it’s a CDN, you’ll need to log on to Bunny and clear the cache if you need to remove files immediately.
There are a few other settings you might want to enable in the Upload settings before you get started, such as Randomize File Names to avoid conflicts and Image Optimization. The Landing Pages option displays a webpage with your image and a download link instead of just the raw file. After spending most of my setup time trying to get this feature to work correctly with Bunny, I decided it was probably better not to clutter the Storage Zone with all those extra folders and files anyway.
A companion app for the iPhone has all the same upload features, as well as the ability to sync settings between your iPhone and Mac using iCloud.
From the limited use I’ve gotten out of it so far, the app functions as expected. I’ll also be exploring more ways to integrate it into my workflow because having a custom file-sharing experience is too cool not to use.
Some links may be referral links. Your price stays the same, but it helps support the blog. Thank you!